Why This Recipe Works
⏰ Effortless Preparation
These cheese straws require just four ingredients and no special equipment, making them perfect for quick snack prep.
💰 Budget-Friendly
Made with pantry staples like flour, butter, and cheddar, this recipe costs less than $2 per serving.
👥 Party-Perfect
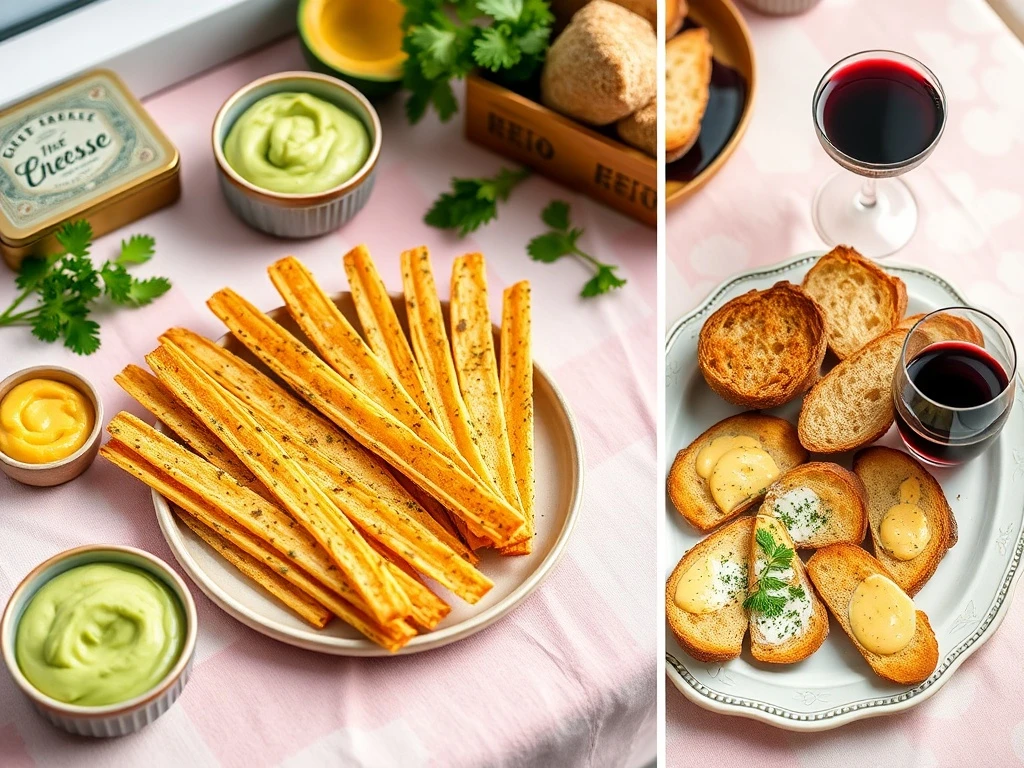
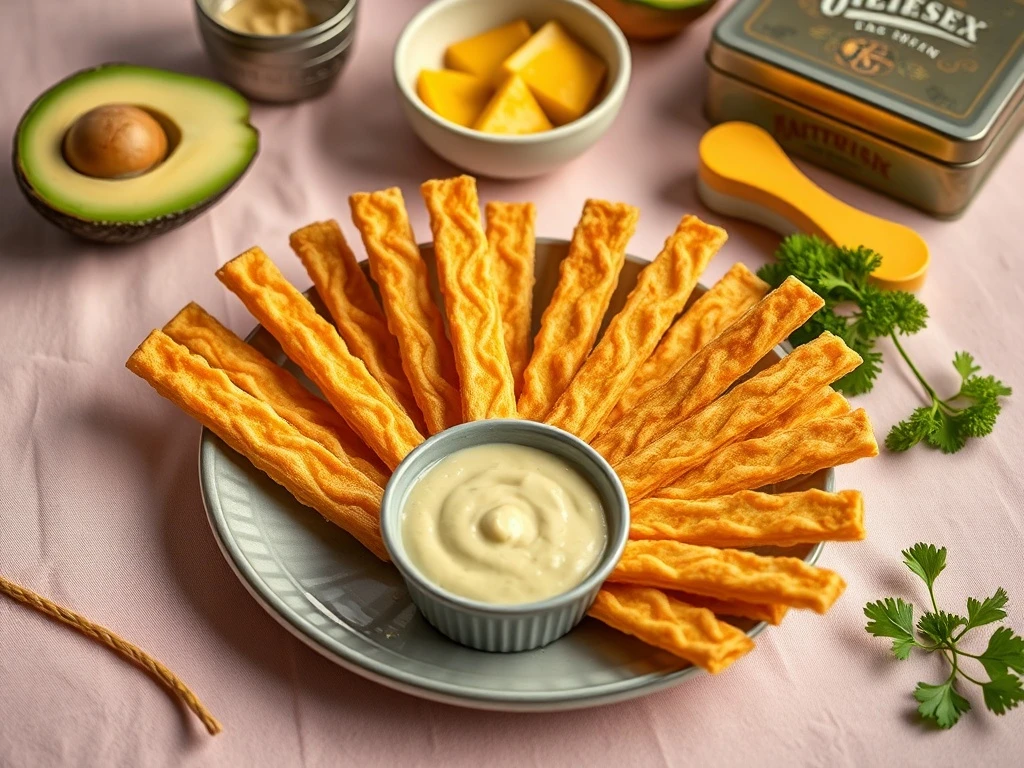
The golden, crispy straws pair beautifully with dips and look stunning on charcuterie boards or snack platters.
🌟 Vintage Charm
This retro recipe brings nostalgic charm to modern snacking with its classic cheese straw shape and texture.
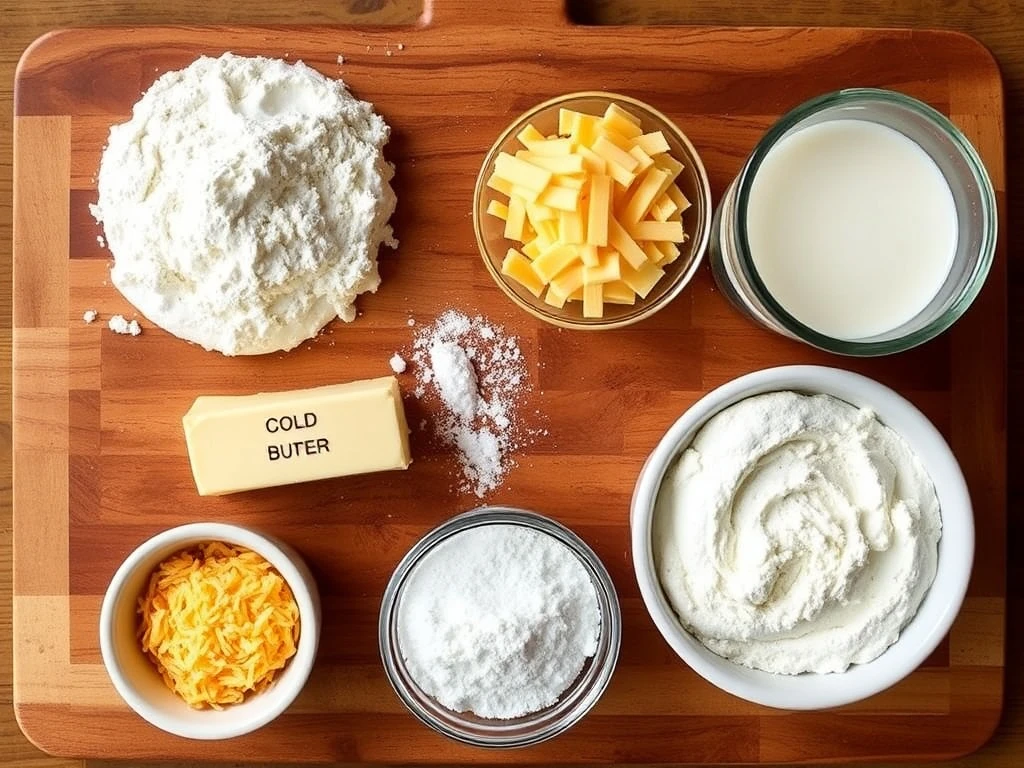
Ingredients You'll Need
- • 1 1/2 cups all-purpose flour
- • 1/2 cup cold unsalted butter, cubed
- • 1 cup grated sharp cheddar cheese
- • 1/2 cup milk
- • 1 teaspoon baking powder
- • Salt to taste

Instructions
Mix Dry Ingredients: In a large bowl, whisk together flour, baking powder, and salt. Add cold butter cubes and use a pastry cutter to blend until mixture resembles coarse crumbs.
💡 Chill the bowl in the freezer for 5 minutes if the butter starts softening.
Add Wet Ingredients: Gradually pour in milk while mixing with a wooden spoon. Add grated cheese and stir until dough comes together.
💡 For gluten-free option, use almond flour and ensure cheese is gluten-free.
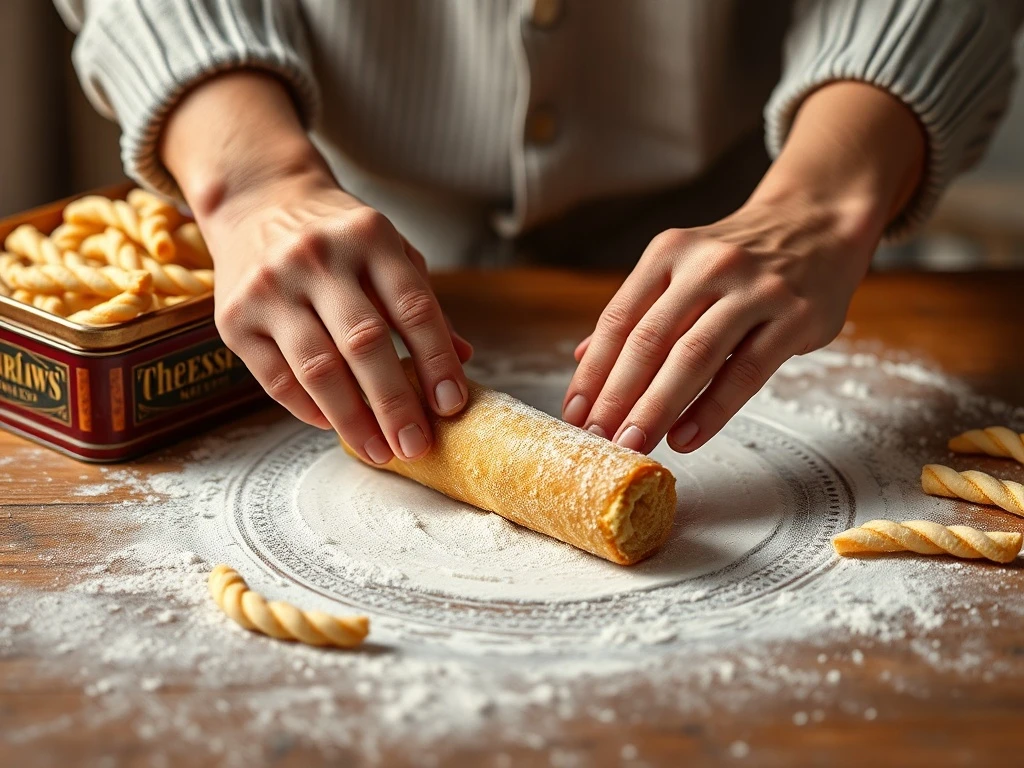
Roll and Cut: Turn dough onto a floured surface. Roll into 1/8-inch thickness. Use a knife to cut long strips (about 1/2-inch wide).
💡 Chill dough for 15 minutes if it becomes sticky.
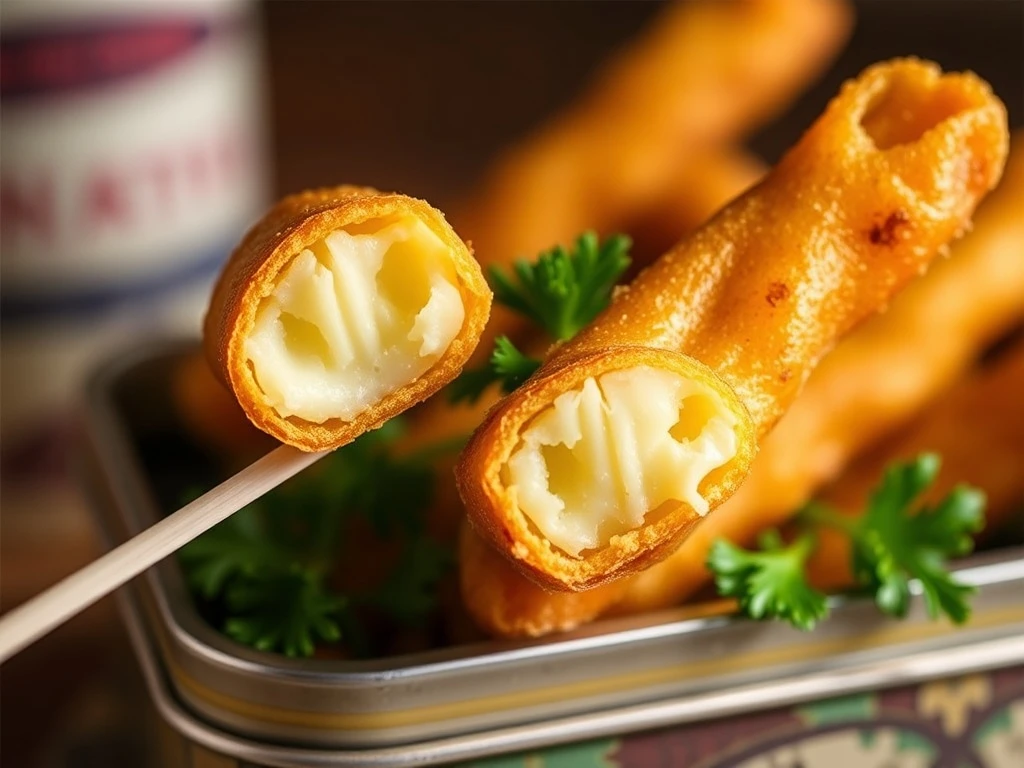
Twist and Bake: Take two strips, twist them together tightly, and place on parchment-lined baking sheet. Repeat with remaining dough. Bake at 375°F (190°C) for 15-18 minutes until golden.
💡 For extra crispiness, bake on a wire rack.
Pro Tips for Perfect Cheese Straws
🔥 Dough Handling
Keep dough cold throughout the process to maintain flaky layers. Work quickly and chill the dough if it warms up.
📏 Consistency
The dough should be firm but not dry. Add a few drops of milk if it's too crumbly, or a bit more flour if sticky.
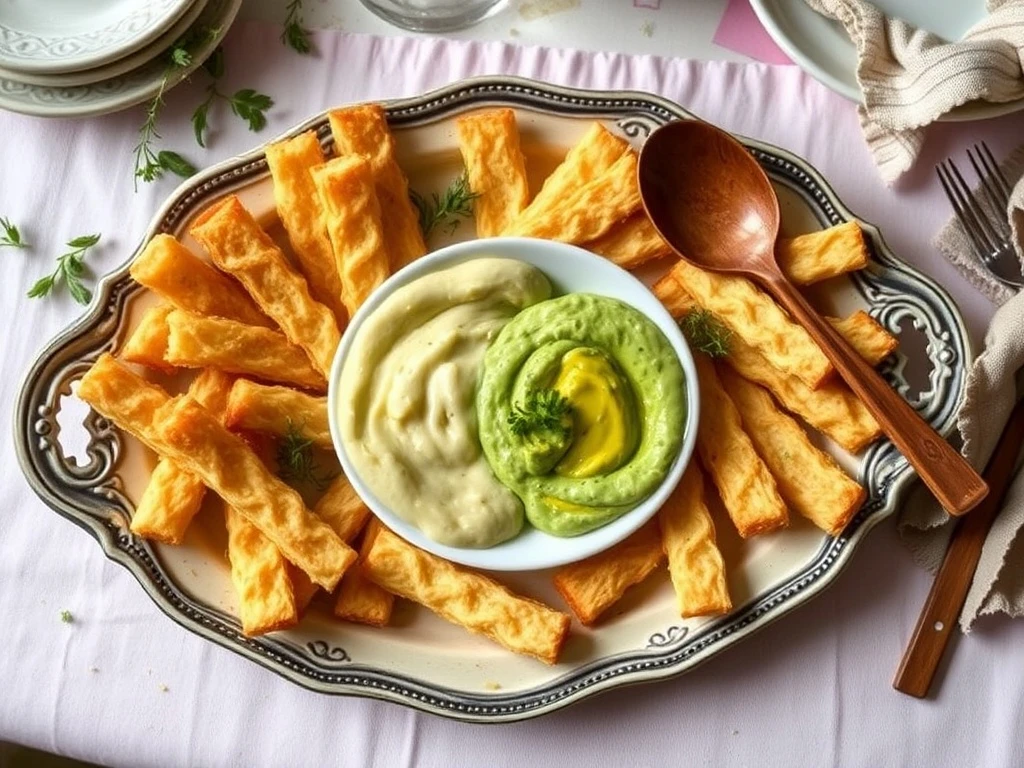
📸 Presentation
Arrange straws in a fan shape on a vintage platter. Add herbs like parsley or thyme for a fresh pop of color.
🍴 Pairing Ideas
Serve with cool avocado dip, spicy salsa, or a tangy mustard glaze for dipping variations.
Variations & Customizations
Herb-Infused Straws
Mix in 1 teaspoon of dried herbs (rosemary, thyme, or oregano) with the flour for aromatic flavor.
Cheese Lovers' Edition
Increase cheddar to 1 1/2 cups and add 1/2 cup parmesan for extra cheesy flavor.
Mini Bites
Cut strips into 2-inch lengths for bite-sized appetizers perfect for cocktail parties.
Sweet Twist
Replace cheddar with cheddar and a touch of brown sugar for a sweet-and-savory treat.
Make-Ahead Instructions & Storage
Make-Ahead Tips
Prepare dough up to 24 hours in advance and chill in an airtight container. Roll and cut just before baking.
Refrigerator Storage
Store cooled straws in an airtight container for up to 3 days. Reheat at 350°F (175°C) for 5 minutes to restore crispness.
Freezer Storage
Freeze baked straws in a single layer on parchment paper, then transfer to a freezer bag. Reheat directly from frozen for 8-10 minutes.
Troubleshooting & Common Questions
Q: Why are my cheese straws soggy?
A: Overloading with milk or underbaking can cause sogginess. Ensure proper baking time and avoid over-handling the dough.
Q: How to prevent dough from sticking?
A: Keep work surfaces and hands well-floured. Chill dough if it becomes too sticky during shaping.
Q: Can I use pre-grated cheese?
A: Freshly grated cheese is ideal, but pre-grated works if you drain excess moisture with a paper towel.
Q: How to achieve perfect twists?
A: Roll strips to even thickness and twist firmly but gently to avoid breaking the straws during shaping.
Final Thoughts
Retro cheese straws are the perfect blend of nostalgic charm and modern snacking. Whether you're hosting a vintage-themed party or just want a crispy, cheesy treat, these straws deliver both flavor and Instagram-worthy presentation.
With their golden, flaky texture and endless customization options, these straws are sure to become a staple in your recipe collection. Pair them with your favorite dips and share the retro magic with friends and family!