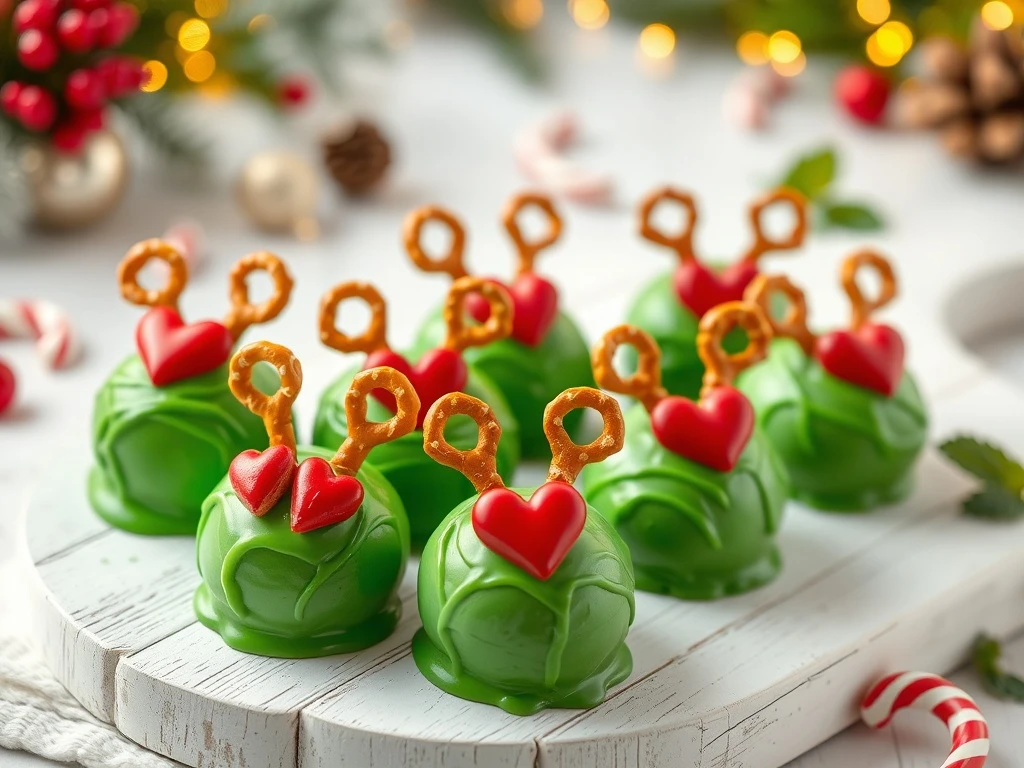
Make your holiday party unforgettable with these festive Grinch Cake Balls!
These Grinch Cake Balls are the perfect combination of cute and delicious! With their green candy melt coating, red candy hearts, and festive decorations, they're sure to be the star of your Christmas dessert table.
Every year, these adorable no-bake treats disappear from my dessert table in minutes. Whether you're hosting a holiday party, participating in a cookie exchange, or simply looking for a fun Christmas activity with your kids, these cake balls are guaranteed to be a hit.
The best part? They're surprisingly easy to make! Just combine crushed Oreos and cream cheese, form into balls, coat in green candy melts, and add festive decorations. The result is a festive, flavorful treat that's perfect for any Christmas gathering.
With their charming Grinch faces and customizable decorations, these cake balls are sure to bring a smile to everyone's face. Keep reading to learn how to make these magical holiday treats!
Why This Recipe Works
No-Bake Convenience
These adorable cake balls require no baking, making them perfect for last-minute holiday preparations. Just mix, chill, and decorate!
Festive Presentation
With their charming Grinch faces, red candy hearts, and festive decorations, these cake balls add a touch of holiday magic to any dessert table.
Customizable Decor
Add pretzel antlers, Santa hats, or even personalized faces to match your holiday theme. The possibilities are endless!
Kid-Friendly Fun
These cake balls are a hit with kids of all ages! Let the little ones help with the decorating for a fun, festive activity.
Ingredient Notes & Substitutions
Oreo Cookies
The base of these cake balls, providing a rich chocolate flavor and texture. For a gluten-free option, use gluten-free Oreos.
Substitutions: You can use any type of chocolate cookies, such as chocolate sandwich cookies or even crushed graham crackers.
Cream Cheese
Adds a creamy texture that holds the cake balls together. Make sure to use room temperature cream cheese for easy mixing.
Substitutions: You can use butter or shortening instead, but the texture may be slightly different.
Candy Melts
Provides a smooth, glossy coating that sets quickly. Look for candy melts in green for the Grinch look.
Substitutions: You can use melted chocolate, but it may be harder to work with.
Candy Decorations
The red candy hearts and chocolate pretzels add festive decorations and texture. Feel free to get creative with other decorations!
Substitutions: Use candy eyes, edible glitter, or even small Christmas ornaments for different looks.
Pro Tips for Perfect Grinch Cake Balls
Chilling is Key
Chill the cake balls for at least 1 hour before coating. This helps them hold their shape and prevents the candy coating from melting.
Work in Batches
If you're making a large quantity, work in small batches to keep the candy coating at the right consistency. Re-melt as needed.
Get Creative with Decor
Don't be afraid to experiment with different decorations! Try using edible markers to draw faces or add holiday-themed toppers.
Make Ahead
These cake balls can be made up to 2 days in advance and stored in an airtight container in the refrigerator.
Variations & Customizations
Christmas-Themed Cake Balls
Use red and green candy melts and add candy cane stripes or snowflake decorations for a classic Christmas look.
Easter-Themed Cake Balls
Swap the green candy melts for pastel colors and add bunny ears or egg decorations for a springtime twist.
Valentine's Day Cake Balls
Use red and pink candy melts and add heart-shaped decorations for a romantic holiday treat.
Birthday Cake Balls
Personalize with different colors and decorations to match a child's birthday theme. Add fondant characters or printed messages.
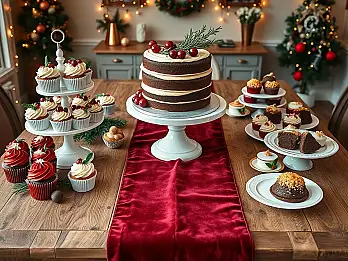
Serving Suggestions & Pairings
🍽️ Best Served With:
- Hot cocoa with marshmallows for a cozy holiday treat
- Mini Christmas cookies for a festive dessert spread
- Red and green fruit skewers for a colorful, healthy option
🍷 Drink Pairings:
Pair these cake balls with spiced chai tea or a festive gingerbread latte for a warm, holiday flavor combination.
Make-Ahead Instructions & Storage
Make-Ahead Tips
These cake balls can be made up to 2 days in advance. Store the uncoated balls in an airtight container in the refrigerator until ready to coat and decorate.
Refrigerator Storage
Store decorated cake balls in an airtight container in the refrigerator for up to 5 days. Allow them to come to room temperature before serving.
Freezer Storage
Place uncoated cake balls in a single layer on a baking sheet and freeze until firm. Transfer to an airtight container and freeze for up to 1 month. Thaw in the refrigerator before coating and decorating.
Reheating Instructions
These cake balls are best served at room temperature. Allow refrigerated or frozen cake balls to come to room temperature before serving for optimal texture and flavor.
Troubleshooting & Common Questions
Q: Why are my cake balls falling apart?
A: The mixture may be too dry. Add a bit more water or a teaspoon of milk to help bind the dough.
Q: How do I prevent the candy coating from cracking?
A: Make sure the cake balls are completely chilled before coating. Work in a cool environment and avoid moving them until the coating is set.
Q: Can I use chocolate instead of candy melts?
A: Yes, you can use melted chocolate, but it may be harder to work with and may not set as smoothly. For best results, use candy melts specifically designed for coating.
Q: How do I get the decorations to stick better?
A: Make sure the candy coating is still slightly tacky before adding decorations. You can also lightly dampen the back of decorations with water or a small amount of icing to help them adhere.
Final Thoughts
These Grinch Cake Balls are the perfect way to add some festive fun to your holiday desserts. With their adorable decorations and delicious flavor, they're sure to be a hit with guests of all ages.
Whether you're hosting a Christmas party, participating in a cookie exchange, or just looking for a fun activity with your kids, these cake balls are a must-try. Don't forget to save this recipe and share it with your friends and family - everyone will want the recipe!