
❄️ Stunning Royal Icing Snowflake Christmas Cookies (Show-Stopper!) – Viral Baking for Holiday Magic
Create dazzling royal icing snowflake cookies that steal the show at holiday parties. Perfect for cookie exchanges, gifting, or festive platters!
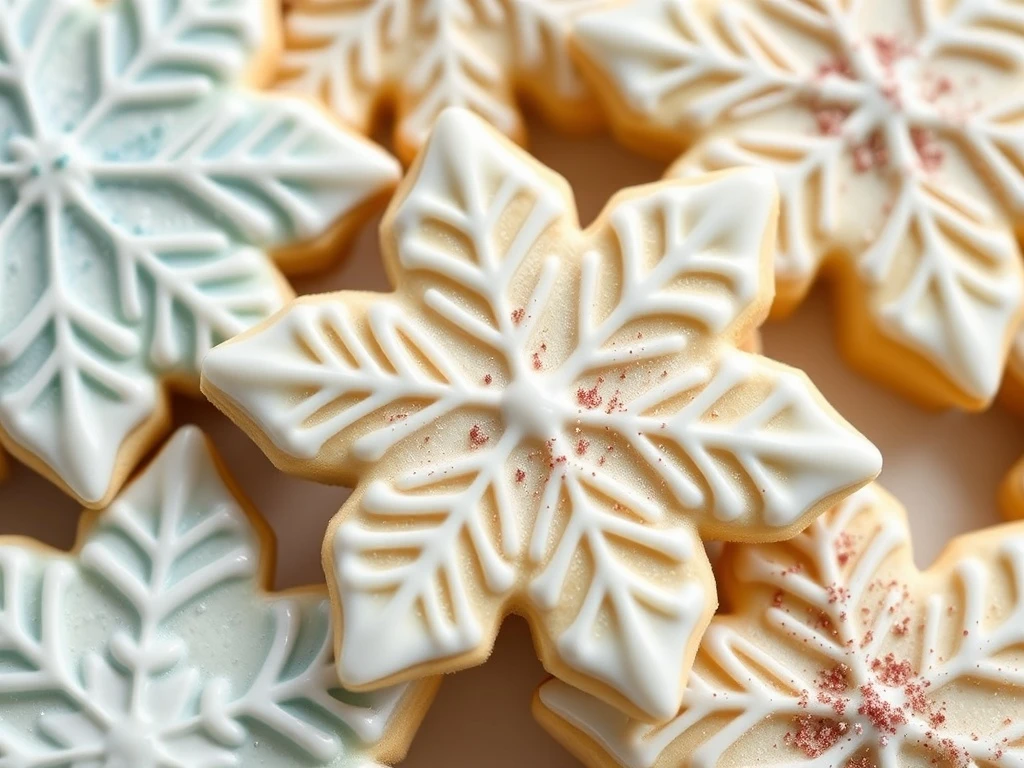
These Royal Icing Snowflake Christmas Cookies are the ultimate holiday showstopper. With crisp buttery cookies and intricate royal icing patterns that sparkle like fresh snow, they're guaranteed to dazzle guests. Whether you're a seasoned decorator or a beginner, these cookies offer endless creativity while delivering a professional finish. Pair them with hot cocoa or peppermint bark for a complete festive treat.
Imagine the joy of biting into a crisp, buttery cookie topped with glossy white royal icing that shimmers under the lights. Each snowflake design is a work of art, perfect for cookie platters, gifting, or holiday markets. This recipe is ideal for morning inspiration when planning your holiday baking, offering a balance of challenge and reward.
The royal icing hardens to a glass-like finish, ensuring your intricate designs stay intact. With step-by-step guidance, even intermediate bakers can achieve professional results. These cookies are a bridge between royal icing techniques and festive snowflake themes, making them a top search for holiday bakers.
From the moment you pipe the first snowflake to the final garnish of edible glitter, every step is designed to inspire creativity. Save this recipe to your Pinterest board and start planning a cookie display that will leave guests in awe.
Ready to elevate your holiday spread? Pin now and let the magic of winter baking begin!
Ingredients
- 2 ½ cups all-purpose flour
- ½ tsp baking powder
- ½ tsp salt
- ½ cup unsalted butter, softened
- ¾ cup powdered sugar
- 2 large egg whites
- 1 tsp vanilla extract
- ¼ cup corn syrup
- 1 tbsp meringue powder
- Food coloring (optional)
- Edible glitter or sugar pearls (optional)
Instructions
- Step 1: Whisk flour, baking powder, and salt. In a separate bowl, cream butter and sugar until light. Add egg whites and vanilla, then gradually mix in dry ingredients. Chill dough for 1 hour.
- Step 2: Roll dough to ¼-inch thickness. Use snowflake cutters to shape cookies. Bake at 350°F (175°C) for 12 minutes. Cool completely.
- Step 3: Mix royal icing: combine powdered sugar, corn syrup, egg whites, and meringue powder. Add food coloring. Let sit 5 minutes, then stir. Adjust consistency with water if needed.
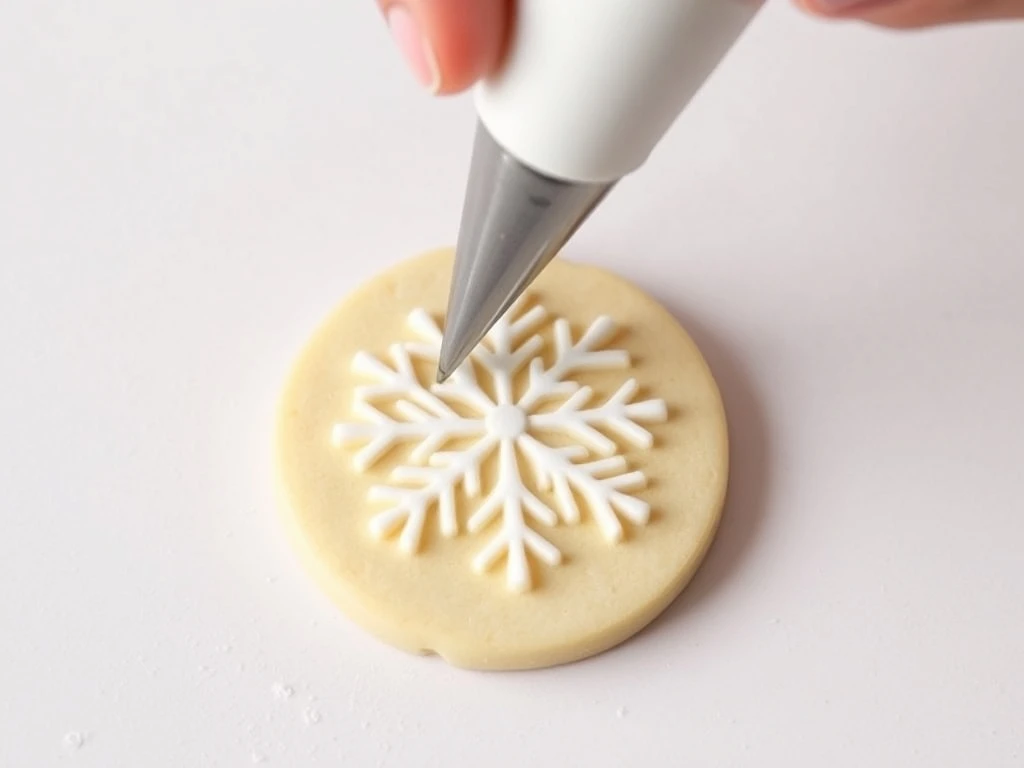
- Step 4: Transfer icing to piping bags. Pipe intricate snowflake patterns on cookies. Add edible glitter while icing is wet. Let dry overnight.
Royal Icing Snowflake Christmas Cookies
Dazzling cookies for holiday magic
🛒 Ingredients
- - 2 ½ cups all-purpose flour
- - ½ tsp baking powder
- - ½ tsp salt
- - ½ cup unsalted butter, softened
- - ¾ cup powdered sugar
- - 2 large egg whites
- - 1 tsp vanilla extract
- - ¼ cup corn syrup
- - 1 tbsp meringue powder
- - Food coloring (optional)
- - Edible glitter or sugar pearls (optional)
👨🍳 Instructions
Prepare Dough: Whisk dry ingredients. Cream butter and sugar, add egg whites and vanilla, then mix in dry ingredients. Chill dough for 1 hour.
💡 Chill dough to prevent spreading.
Bake Cookies: Roll dough to ¼-inch thickness. Use snowflake cutters and bake at 350°F (175°C) for 12 minutes.
💡 Use parchment paper for even baking.
Make Royal Icing: Mix powdered sugar, corn syrup, egg whites, and meringue powder. Let sit 5 minutes.
💡 Adjust consistency with water if needed.
Pipe Snowflakes: Transfer icing to piping bags. Pipe intricate snowflake patterns. Add edible glitter while icing is wet.
💡 Let dry overnight for a glossy finish.
Nutrition (per serving):
Ingredient Notes & Substitutions
All-Purpose Flour
Provides structure and crispness. Substitute with gluten-free flour blend for dietary needs.
Substitutions: Gluten-free flour, almond flour (add xanthan gum)
Royal Icing
Creates a glass-like finish. For vegan version, replace egg whites with aquafaba.
Substitutions: Aquafaba, cornstarch for meringue powder
Edible Glitter
Adds festive sparkle. Use non-pearlized sprinkles if unavailable.
Substitutions: Sugar pearls, crushed candies
Meringue Powder
Stabilizes icing. Substitute with 1 tbsp egg white and ¼ tsp cream of tartar.
Substitutions: Egg whites, cornstarch
Pro Tips for Perfect Snowflake Cookies
❄️ Consistency Check
Royal icing should drizzle slowly from a spoon. Adjust with water if too thick or corn syrup if too runny.
🎨 Color Layering
Pipe light colors first, then add darker accents for depth. Let each layer dry before adding new colors.
📐 Stencil Magic
Use parchment paper stencils for consistent snowflake shapes. Trace designs with a pencil before piping.
✨ Sparkle Technique
Sprinkle glitter while icing is still wet for maximum adhesion. Gently tap off excess after 10 minutes.
Variations & Customizations
Mini Snowflakes
Use smaller cutters for bite-sized cookies. Perfect for cookie towers or party favors.
Colorful Snowflakes
Use food coloring to create rainbow or monochrome snowflakes. Try metallic colors for a modern twist.
3D Snowflakes
Pipe raised icing patterns for dimensional effects. Add sugar crystals for texture.
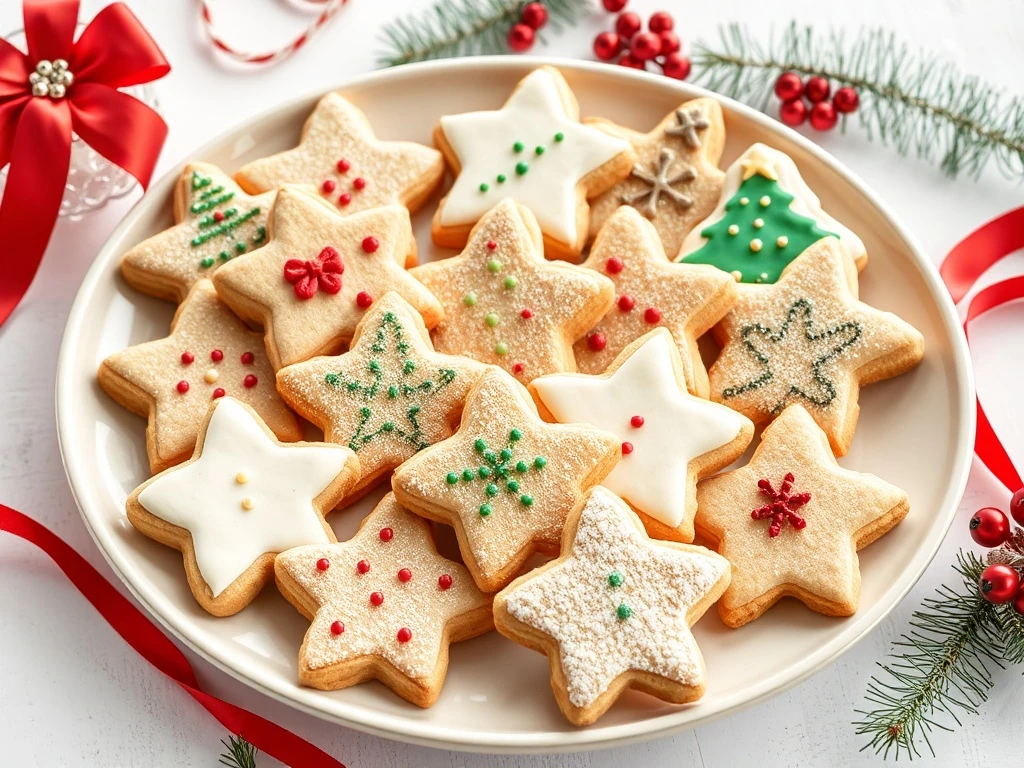
Themed Snowflakes
Incorporate holiday symbols like stars, trees, or bells into your snowflake designs.
Serving Suggestions & Pairings
🍽️ Best Served With:
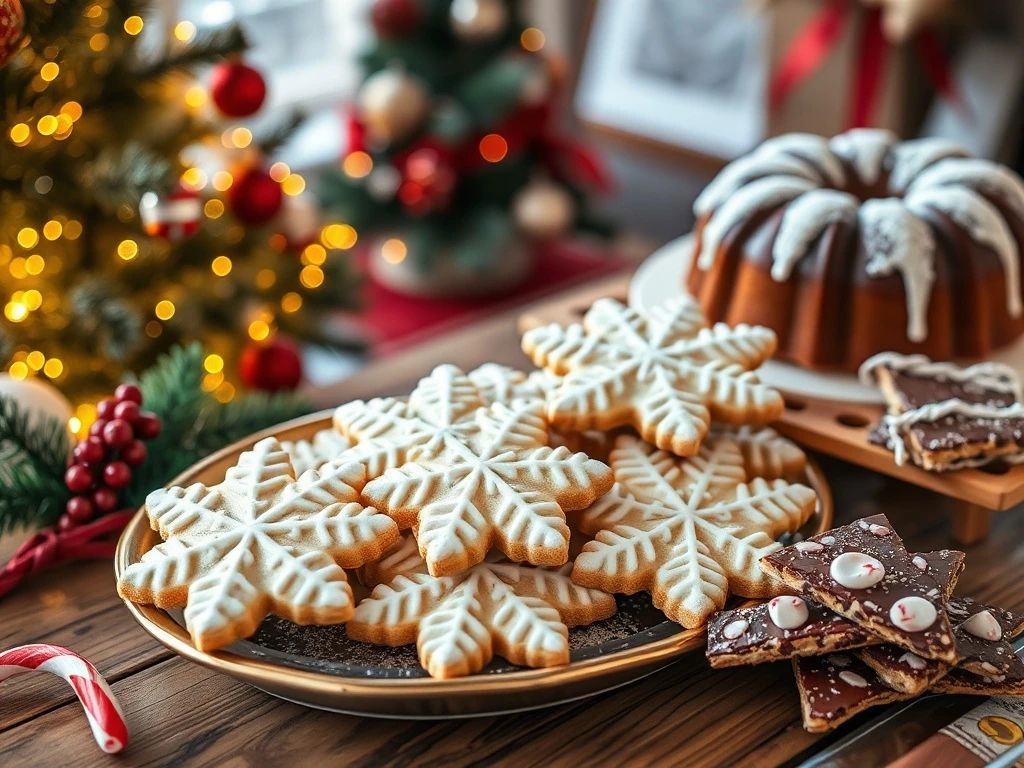
- Steaming mugs of hot cocoa with marshmallows
- Peppermint bark for a festive flavor combo
- Vanilla ice cream for a decadent dessert
🍷 Drink Pairings:
Pair with spiced chai tea or mulled wine for a cozy holiday experience.
Make-Ahead Instructions & Storage
Make-Ahead Tips
Prepare dough and royal icing up to 3 days in advance. Store in airtight containers in the fridge.
Refrigerator Storage
Store baked cookies in an airtight container for up to 5 days. Keep icing separate to prevent sogginess.
Freezer Storage
Unbaked dough can be frozen for 1 month. Wrap tightly in plastic wrap before freezing.
Reheating Instructions
Do not reheat. Best served at room temperature to maintain crispness and icing integrity.
Troubleshooting & Common Questions
Q: Icing cracks before drying
A: Adjust humidity - bake in a dry environment. Add 1-2 drops of lemon juice to the icing to prevent cracking.
Q: Cookies spread during baking
A: Chill dough for at least 1 hour. Use parchment paper to prevent sticking and spreading.
Q: Icing doesn't harden properly
A: Ensure proper ratio of egg whites to meringue powder. Store in a dry, warm place to cure completely.
Q: How to fix uneven snowflake patterns
A: Use a turntable and light source to check symmetry. Practice on parchment paper before decorating final cookies.
Final Thoughts
These Royal Icing Snowflake Cookies are more than just a dessert - they're a holiday masterpiece that brings joy to bakers and guests alike. With their intricate designs and crisp texture, they're sure to become a cherished tradition in your kitchen.
Whether you're creating a cookie platter for family or gifting to friends, these cookies offer endless opportunities for creativity. Pair them with hot cocoa or peppermint bark for a complete festive experience. For best Pinterest visibility, post this recipe as part of a complete meal series over 5-7 days: start with the cookies, followed by complementary sides like spiced apple cake, and finish with a decadent peppermint chocolate tart. Happy baking!
❄️ Stunning Royal Icing Snowflake Christmas Cookies (Show-Stopper!) – Viral Baking for Holiday Magic
Create dazzling royal icing snowflake cookies for your holiday platter. Perfect for gifting or cookie exchanges with professional results.
Ingredients
Instructions
Whisk dry ingredients. Cream butter and sugar, add egg whites and vanilla, then mix in dry ingredients. Chill dough for 1 hour.
Roll dough to ¼-inch thickness. Use snowflake cutters and bake at 350°F (175°C) for 12 minutes.
Mix powdered sugar, corn syrup, egg whites, and meringue powder. Let sit 5 minutes.
Transfer icing to piping bags. Pipe intricate snowflake patterns. Add edible glitter while icing is wet.
Nutrition Facts
Base nutrition per 1 cookie. Values displayed below are the total for 24 servings.
Calories
150
Protein
2g
Carbs
20g
Fat
6g
Fiber
-
Sugar
-
Frequently Asked Questions
Icing cracks before drying
Adjust humidity - bake in a dry environment. Add 1-2 drops of lemon juice to the icing to prevent cracking.
Cookies spread during baking
Chill dough for at least 1 hour. Use parchment paper to prevent sticking and spreading.
Icing doesn't harden properly
Ensure proper ratio of egg whites to meringue powder. Store in a dry, warm place to cure completely.
How to fix uneven snowflake patterns
Use a turntable and light source to check symmetry. Practice on parchment paper before decorating final cookies.
Reviews
Share Your Experience
1 review (1 chef review + 0 visitor reviews)
Based on 1 chef review and 0 visitor reviews
No reviews yet. Be the first to share your thoughts!
KEYWORDS
Recipe by
Marcus Hale
Similar Recipes


Recipe Tags
Explore more recipes with similar tags
Marcus Hale
Nov 17, 2025
Made royal icing snowflake cookies for a occasion and shared them. Crisp buttery, powdered sugar dusted them snow softly. Baked with reduced salt to enhance flavor, I, Chef Sarah Martinez, cooked a bit less, keeping the interior airy during baking. Five stars, perfect holiday magic, will share.