Easy Snowman Cookie Decorating with Kids (Frosty Fun!) – Step-by-Step Guide
Create festive snowmen with your kids using pre-made dough and royal icing – perfect for holiday fun!
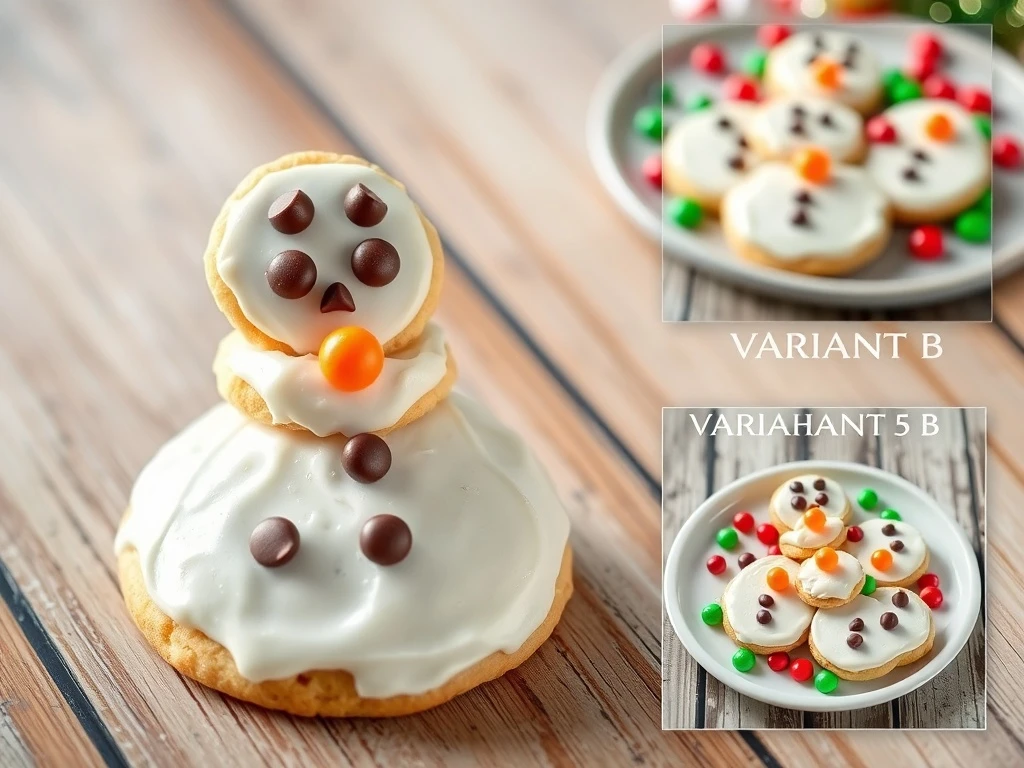
Snowman cookie decorating is the ultimate family activity that combines baking, creativity, and holiday cheer. With pre-made dough and simple tools, even little hands can craft adorable snowmen that look like they’ve stepped right out of a winter wonderland. This guide walks you through every step, from rolling out the dough to adding the final candy eyes, ensuring a mess-free, joyful experience for kids of all ages.
Whether you’re preparing for a holiday party or just want to add festive flair to your kitchen, these cookies make the perfect edible keepsakes. The process is designed to be quick and easy – just 20 minutes of prep time and 10 minutes in the oven. Best of all, your kids will be engaged from start to finish, learning basic baking skills while creating personalized masterpieces.
We’ll cover everything you need to know, from choosing the right ingredients to decorating tips that turn simple cookies into charming snowmen. Plus, you’ll find variations to make each cookie unique and serving suggestions that complete the holiday meal. Let’s dive into this frosty fun!
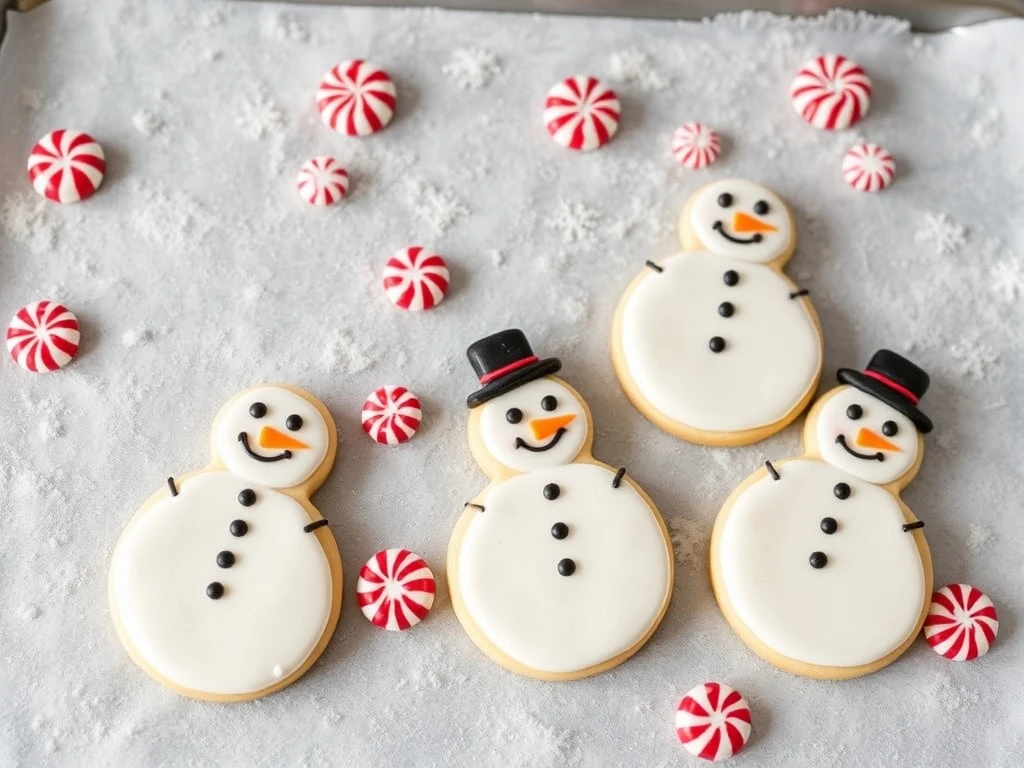
This activity pairs perfectly with the Anchor Kid-Friendly Fun Christmas Cookie Kit, which includes all the tools and decorations needed for a complete cookie decorating experience. The kit allows kids to create a full snowman cookie family on a single plate, making it ideal for gift-giving or holiday table centerpieces.
With step-by-step photos and kid-friendly tips, this guide ensures even first-time bakers will succeed. Save this pin for a mess-free, joyful decorating session that brings smiles to every child. Pin now and start building frosty cookie characters! Which snowman detail do your kids love adding most? 💬
Ingredients
- 1 package refrigerated sugar cookie dough
- 1 bag white royal icing (already prepared)
- 1 bag chocolate chips (mini for eyes)
- 1 bag orange candy pieces (for noses)
- 1 bag candy eyes (optional alternative to chocolate chips)
- 1 bag candy corn or small pretzels (for arms)
- 1 bag red candy sprinkles (for buttons)
- 1 bag edible glitter (optional for extra sparkle)
- 1 bag decorator sugar (optional for snow effect)
- 1 set cookie cutters (snowman shapes of various sizes)
Instructions
- Step 1: 1
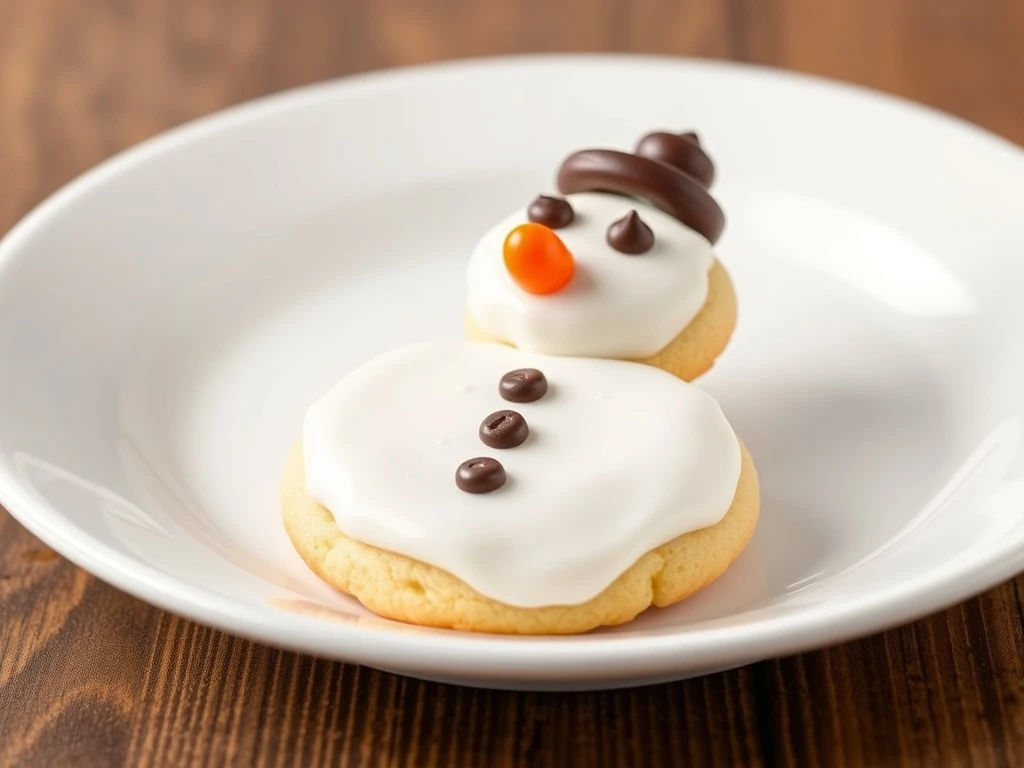
Prepare the Dough: Roll out the cookie dough on a lightly floured surface to 1/4-inch thickness. Use snowman-shaped cookie cutters to cut out 3 sizes of circles for each snowman (large for the body, medium for the middle, and small for the head). Place the cutouts on a baking sheet lined with parchment paper.
💡 For younger kids, let them experiment with hand-cutting freeform snowmen!
- Step 2: 2
Bake the Cookies: Bake at 375°F (190°C) for 8-10 minutes or until the edges are lightly golden. Let the cookies cool completely on the baking sheet before decorating. Place them on a wire rack to cool further.
💡 Cool completely to prevent the icing from melting!
- Step 3: 3
Outline the Snowmen: Using a piping bag with a small round tip, outline the snowmen’s faces, arms, and details with white royal icing. Let the outlines dry for 15-30 minutes to set.
💡 Use a toothpick to correct any wobbly lines!
- Step 4: 4
Fill in the Details: Fill in the outlined areas with royal icing. Add chocolate chips for eyes, an orange candy piece for the nose, and candy corn or pretzels for arms. Sprinkle red candy for buttons and add edible glitter for sparkle.
💡 Let kids choose their favorite candy decorations!
Why This Recipe Works
⏰ Easy for Kids
The pre-made dough and simple decorating steps make this perfect for little bakers. No complex techniques required!
💰 Affordable and Quick
You’ll spend less than $15 on ingredients and finish in under an hour, making it a budget-friendly activity.
👥 Family-Friendly
Everyone can participate – from rolling dough to adding final decorations. It’s a bonding experience!
🌟 Festive and Fun
The result is a collection of charming snowmen that double as holiday treats and decorations.
Ingredient Notes & Substitutions
White Royal Icing
This is essential for creating smooth, detailed snowmen. It dries hard and holds decorations well.
Substitutions: Use store-bought icing or make your own with powdered sugar and water.
Chocolate Chips
Perfect for eyes due to their size and firm texture. They stay put and are kid-friendly.
Substitutions: Use candy eyes for a more realistic look or sliced almonds for a vegan option.
Orange Candy Pieces
These add a pop of color for the nose and are easy for small hands to handle.
Substitutions: Use orange M&Ms or candied fruit slices for a different texture.
Candy Corn
Great for arms and adds a festive touch. They’re sturdy and colorful.
Substitutions: Use pretzel rods for a salty-sweet contrast or licorice for a twist.
Pro Tips for Perfect Snowman Cookies
❄️ Prep Like a Pro
Chill the dough for 15 minutes after rolling to prevent spreading during baking.
🎨 Decoration Tricks
Use a toothpick to gently attach candy pieces to the icing for secure placement.
👨👩👧👦 Kid-Friendly Tips
Let younger kids use cookie cutters with handles for easier cutting.
📸 Presentation Ideas
Arrange cookies on a frosted baking sheet for a snowy effect. Add peppermint candies as snowflakes!
Variations & Customizations
Mini Snowmen
Use small cookie cutters for bite-sized versions. Perfect for cookie platters or gift boxes.
Themed Snowmen
Add holiday-themed decorations like candy canes for arms or red bows for hats.
Vegan Version
Use vegan cookie dough and substitute royal icing with a vegan recipe (powdered sugar + plant-based milk).
Edible Glitter
Sprinkle edible glitter on the cookies for a magical, sparkling effect that kids love.
Serving Suggestions & Pairings
🍽️ Best Served With:
- Hot cocoa with marshmallows for a cozy winter treat
- Festive Christmas tea or spiced apple cider
- A platter of holiday fruits like apples and oranges
🍷 Drink Pairings:
Pair with a warm, spiced chai latte or a sparkling apple cider for a festive touch.
Make-Ahead Instructions & Storage
Make-Ahead Tips
You can roll out and cut the dough up to 24 hours in advance. Freeze the cutouts on the baking sheet, then transfer to a zip-top bag. Bake as directed.
Refrigerator Storage
Store decorated cookies in an airtight container in the fridge for up to 3 days. Keep them away from direct sunlight.
Freezer Storage
Un-decorated baked cookies can be frozen for up to 2 months. Thaw at room temperature before decorating.
Reheating Instructions
These cookies are best enjoyed at room temperature. Avoid microwaving as it can soften the icing.
Troubleshooting & Common Questions
Q: How do I prevent the icing from sliding off?
A: Ensure the cookies are completely cooled before adding icing. Let the outlines dry for 15-30 minutes before filling in details.
Q: Can I use other types of dough?
A: Yes! Try using shortbread or gingerbread dough for a different flavor profile. Adjust baking time accordingly.
Q: My icing is drying too quickly. What should I do?
A: Cover the icing with a damp cloth while working. If it’s too thick, add a small amount of water and mix thoroughly.
Q: How can I make the snowmen look more realistic?
A: Use a toothpick to add texture to the snowmen’s bodies by gently dragging it through the icing.
Final Thoughts
Snowman cookie decorating is more than just a baking project – it’s a magical way to connect with your kids and create lasting memories. The joy of watching their faces light up as they craft each detail is priceless. Whether you’re making a few cookies for a holiday party or filling an entire cookie platter, this activity brings the spirit of the season to life.
Don’t forget to capture the fun with photos of your little bakers in action. These cookies make excellent gifts, classroom treats, or even a festive breakfast. With simple ingredients and easy steps, you’ll have a batch of charming snowmen in no time. So gather your family, roll up your sleeves, and let the frosty fun begin!