Easy No-Bake Chocolate Oreo Bites (Kid-Friendly) – Mess-Free Sweet Snacks in 10 Minutes!
A no-bake, kid-friendly chocolate treat that’s ready in minutes—perfect for holidays or after-school snacks!
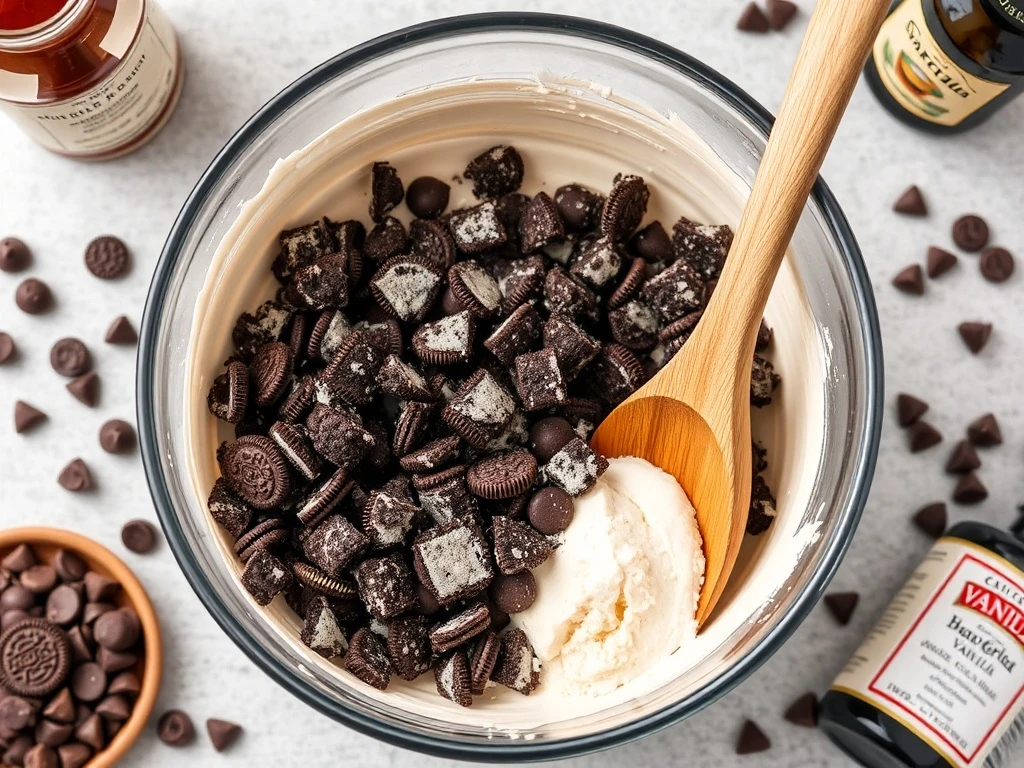
These Easy No-Bake Chocolate Oreo Bites are a game-changer for busy days, holidays, or family activities. With just three ingredients—Oreos, melted chocolate, and a hint of vanilla—this recipe creates rich, fudgy bites that kids can help assemble. No oven required, no messy cleanup, and ready in under 15 minutes. Store them in the fridge for a quick treat anytime!
Whether you’re prepping for Thanksgiving or need a last-minute snack for the kids, these bites are a crowd-pleaser. The combination of crushed Oreos and smooth chocolate creates a delightful texture contrast, while the addition of vanilla adds a subtle depth. Best of all, they’re customizable—add sprinkles, swap in different cookies, or drizzle with extra chocolate for a festive touch.
This recipe is perfect for involving kids in the kitchen. Let them crush the cookies, mix the ingredients, and shape the bites. It’s a fun, hands-on activity that results in a tasty reward. Plus, the no-bake aspect means no waiting for the oven to preheat—just grab your ingredients and get started!
The beauty of these bites lies in their simplicity. With no complex techniques or equipment, even the most inexperienced bakers can master this recipe. They’re also incredibly versatile—adjust the chocolate type (dark, milk, or even white) to suit your taste, or add a pinch of salt for a sweet-and-savory twist.
For holidays like Thanksgiving, these bites make a charming addition to dessert tables or gift baskets. Wrap them individually in cellophane for a personalized touch, or place them in mason jars for a rustic, homemade feel. They’re also a great make-ahead treat—store them in the fridge for up to a week or freeze for longer shelf life.
Ingredients
- 10–12 Oreo cookies (or store-bought crushed Oreos)
- 1/3 cup semi-sweet chocolate chips, melted
- 1 teaspoon vanilla extract
- Pinch of salt (optional)
- Additional crushed Oreos or sprinkles for coating (optional)

Instructions
- Step 1: Crush the Oreos. Place 10–12 Oreos in a food processor and pulse until you get fine crumbs (about 1 cup). Alternatively, crush them manually using a rolling pin and plastic wrap.
- Step 2: Melt the chocolate. In a microwave-safe bowl, heat chocolate chips in 30-second intervals, stirring between each, until smooth. Add vanilla extract and a pinch of salt.
- Step 3: Mix the ingredients. Combine crushed Oreos with melted chocolate mixture. Stir until fully coated and a sticky dough forms.
- Step 4: Shape the bites. Scoop tablespoon-sized portions and roll into balls. For extra texture, roll in additional crushed Oreos or sprinkles.
- Step 5: Chill. Place on a parchment-lined tray and refrigerate for 15–20 minutes until firm.

Why This Recipe Works
⏰ Quick & Easy
Requires no baking, oven, or complex tools. Ready in under 15 minutes with minimal effort.
💰 Budget-Friendly
Uses common pantry staples—Oreos, chocolate, and vanilla—that are affordable and widely available.
👥 Kid-Friendly
Perfect for involving children in the kitchen. No heat or sharp tools required—just mixing and shaping.
🌟 Customizable
Add sprinkles, swap cookies, or drizzle with extra chocolate for endless variations.
Ingredient Notes & Substitutions
Oreos
The base of these bites—crushed Oreos provide texture and flavor. Use regular or golden Oreos based on preference.
Substitutions: Store-bought crushed Oreos, graham crackers, or digestive biscuits.
Chocolate
Melted chocolate binds the mixture and adds richness. Use semi-sweet, dark, or milk chocolate as desired.
Substitutions: White chocolate, cocoa powder mixed with butter, or dairy-free chocolate for vegan options.
Vanilla Extract
Enhances the chocolate flavor and adds depth. Use pure vanilla for best results.
Substitutions: Almond extract for a nutty twist, or skip entirely.
Sprinkles
Optional topping for extra festive appeal. Use crushed nuts, coconut flakes, or shredded chocolate for texture.
Substitutions: Crushed candy canes, crushed cookies, or edible glitter.
Pro Tips for Perfect Bites
✨ Use a Food Processor
Crushing Oreos in a food processor ensures even texture. If none is available, use a ziplock bag and rolling pin.
💡 Chill for Firmness
Refrigerating the bites firms the chocolate, making them easier to handle and store.
🍪 Add Texture
Roll the bites in crushed Oreos, sprinkles, or cocoa powder for a visually appealing finish.
📅 Make-Ahead Tip
Store the dough in an airtight container in the fridge for up to 2 days before shaping.
Variations & Customizations
Mini Bites
Use a small cookie scoop to make bite-sized versions for parties or kid-friendly snacks.
Dipped Bites
Dip half of each bite in melted white chocolate and sprinkle with colored sugar for a festive look.
Nutty Twist
Add 1/4 cup chopped walnuts or pecans to the mixture for extra crunch and protein.
Citrus Zest
Mix in a teaspoon of orange or lemon zest for a refreshing, tangy contrast to the chocolate.
Serving Suggestions & Pairings
🍽️ Best Served With:
- Vanilla ice cream for a classic duo
- Fruit platter with strawberries or grapes for balance
- Hot chocolate or milk for a cozy snack
🍷 Drink Pairings:
Pair with a glass of milk, spiced chai, or a light red wine like Pinot Noir.
Make-Ahead & Storage
Make-Ahead Tips
Prepare the dough 1–2 days in advance and refrigerate until ready to shape.
Refrigerator Storage
Store in an airtight container in the fridge for up to 5 days. Keep them chilled until serving.
Freezer Storage
Freeze unshaped dough in a log or shaped bites for up to 3 months. Thaw in the fridge before serving.
Reheating Instructions
No reheating needed—serve chilled for the best texture.
Troubleshooting & Common Questions
Q: Mixture is too dry—what should I do?
A: Add 1–2 teaspoons of milk, melted butter, or additional chocolate to bind the ingredients.
Q: Can I use gluten-free Oreos?
A: Yes—use gluten-free cookies for a safe option for those with dietary restrictions.
Q: How do I prevent the bites from sticking?
A: Lightly coat your hands with flour or cocoa powder when shaping the dough.
Q: Can I add other flavors?
A: Absolutely! Try adding cocoa powder, cinnamon, or a pinch of cayenne for a spicy kick.
Final Thoughts
These No-Bake Chocolate Oreo Bites are a versatile, kid-approved treat that’s perfect for any occasion. Whether you’re hosting a holiday party, need a quick snack for the kids, or want to impress guests with minimal effort, this recipe delivers. The combination of rich chocolate and crumbly Oreos is irresistible, and the endless customization options make it a favorite for bakers of all skill levels.
Don’t let the simplicity fool you—these bites are a crowd-pleaser that’s sure to become a staple in your kitchen. Try them with a glass of milk, a scoop of ice cream, or as part of a festive dessert spread. The best part? They’re ready in minutes, with no oven required. What are you waiting for? Grab your Oreos and start mixing!