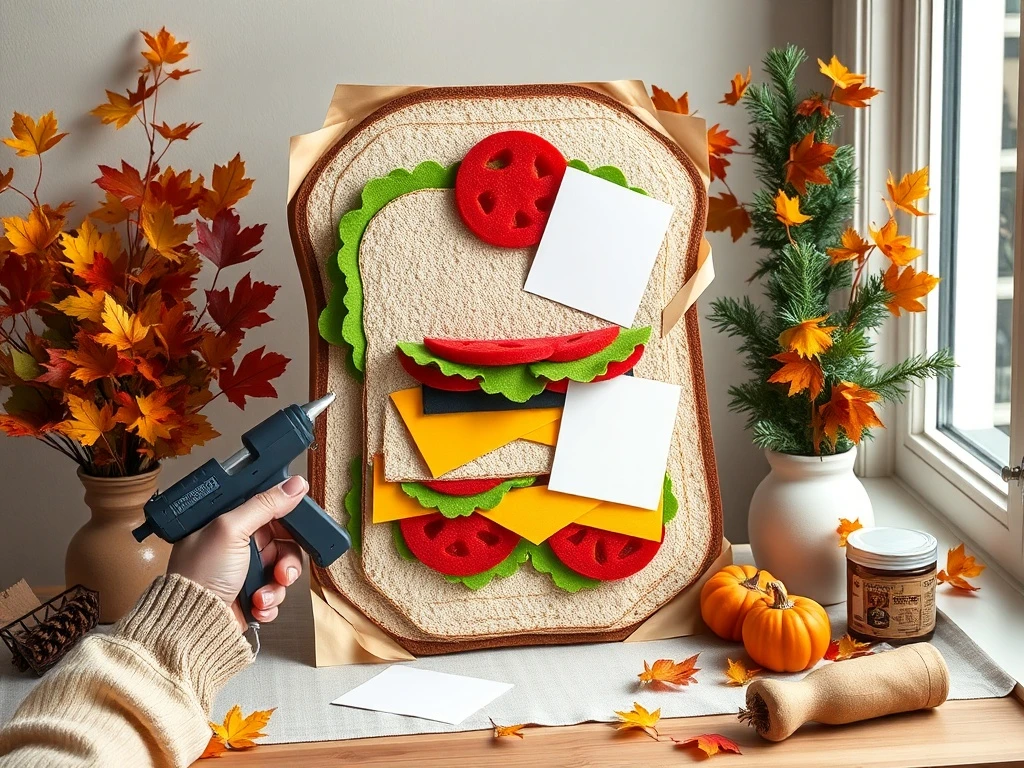
Create a festive photo backdrop for National Sandwich Day!
This DIY Sandwich Day board turns any space into a sandwich-themed photo booth. With layered felt, autumn leaves, and a printable template, it's perfect for parties, classrooms, or creative photo sessions.
Whether you're celebrating National Sandwich Day or hosting a fall-themed event, this project adds a playful touch to your decor. The board doubles as a functional craft project and a festive photo prop.
The guide includes a free printable template, material list, and quick-assembly video. You'll learn how to create a large cardboard sandwich backdrop with colorful felt layers and seasonal accents.
Perfect for photo booths, classroom walls, or home parties. Pin it now and start building your edible-inspired masterpiece!
Why This Project Works
⏰ Time-Saving Design
The pre-cut template and modular design let you assemble the board in under an hour. No advanced crafting skills required.
💰 Budget-Friendly
Use affordable materials like cardboard, felt scraps, and autumn leaves from your backyard for a cost-effective project.
👥 Family-Friendly
Perfect for involving kids in the creation process. The simple assembly makes it a great collaborative project.
🌟 Versatile Use
Use it as a photo backdrop, classroom decoration, or even a holiday-themed wall art piece for any season.
Material Notes & Substitutions
Corrugated Cardboard
Provides a sturdy base for the board. Substitute with thick poster board if cardboard isn't available.
Substitutions: Thick foam board or plywood for a more durable option.
Acrylic Paint
Creates a realistic baked bread texture. Use food-safe paint if using for edible props.
Substitutions: Watercolor for a softer look or felt markers for a hand-drawn effect.
Felt Sheets
Adds dimension to the sandwich layers. Use fabric scraps if felt isn't available.
Substitutions: Flannel or felted wool for texture variation.
Autumn Leaves
Adds seasonal flair. Press real leaves between books for preservation or use printed leaf templates.
Substitutions: Fabric leaves or felt cutouts for a reusable option.
Pro Tips for Perfect Boards
✂️ Cutting Techniques
Use a self-healing mat and sharp utility knife for clean cuts. Apply glue sparingly to avoid warping.
🎨 Color Layering
Build up paint layers for depth. Let each coat dry completely before adding the next for a smooth finish.
🌿 Seasonal Accents
Vary leaf colors and sizes for visual interest. Add small twigs or berries for extra fall charm.
📸 Display Ideas
Mount the board on a wall or prop it against a bookshelf. Use a tripod for stable photo booth setups.
Variations & Customizations
Mini Board for Kids
Create smaller versions for classroom projects. Use washable glue and child-safe materials.
Themed Sandwiches
Design boards for specific sandwich types (club, BLT, turkey) using relevant ingredients and colors.
Holiday Versions
Adapt the design for holidays with themed decorations (Christmas stars, Easter eggs, etc.).
Interactive Boards
Add magnetic accessories so guests can rearrange ingredients for fun photo opportunities.
Serving Suggestions & Display Ideas
🍽️ Best Display Locations
- Photo booth setup in party venues
- Classroom walls for art projects
- Restaurant takeout window backdrop
- Home office as a decorative accent
🍷 Complementary Decor
Pair with small sandwich props, vintage cookbooks, or a chalkboard menu for a cohesive display.
Make-Ahead & Storage Instructions
Preparation Tips
Assemble the board 2-3 days ahead. Store in a flat box to prevent warping.
Short-Term Storage
Cover with a breathable fabric to protect from dust. Keep in a dry, cool place.
Long-Term Storage
Disassemble felt pieces and store in labeled zip bags. Cardboard base can be wrapped in plastic for protection.
Display Maintenance
Dust with a soft cloth. Avoid direct sunlight to prevent color fading.
Troubleshooting & FAQs
Q: How do I fix uneven paint layers?
A: Sand rough areas with fine-grit sandpaper and repaint. Apply thin, even coats for better results.
Q: Can I use fabric glue instead of hot glue?
A: Yes, fabric glue works well for attaching felt. It dries clear and is less likely to burn.
Q: How to make the board more stable?
A: Add a wooden backing or attach felt feet to the bottom for better balance.
Q: What if I run out of felt?
A: Use colored paper or fabric scraps. Layer multiple thin materials for similar texture.
Final Thoughts
This DIY Sandwich Day board combines creativity and functionality. Whether you're capturing family photos or creating a festive event backdrop, this project adds a playful touch to any space.
The step-by-step guide ensures even beginners can complete it in an afternoon. Share your finished board on social media with #SandwichDayDIY and inspire others to try this crafty celebration!