Elevate your holiday cookies with a professional gifting layout
This creative cookie box layout turns your homemade cookies into a holiday masterpiece. With just a few festive touches, you'll create a gift that's as beautiful as it is delicious.
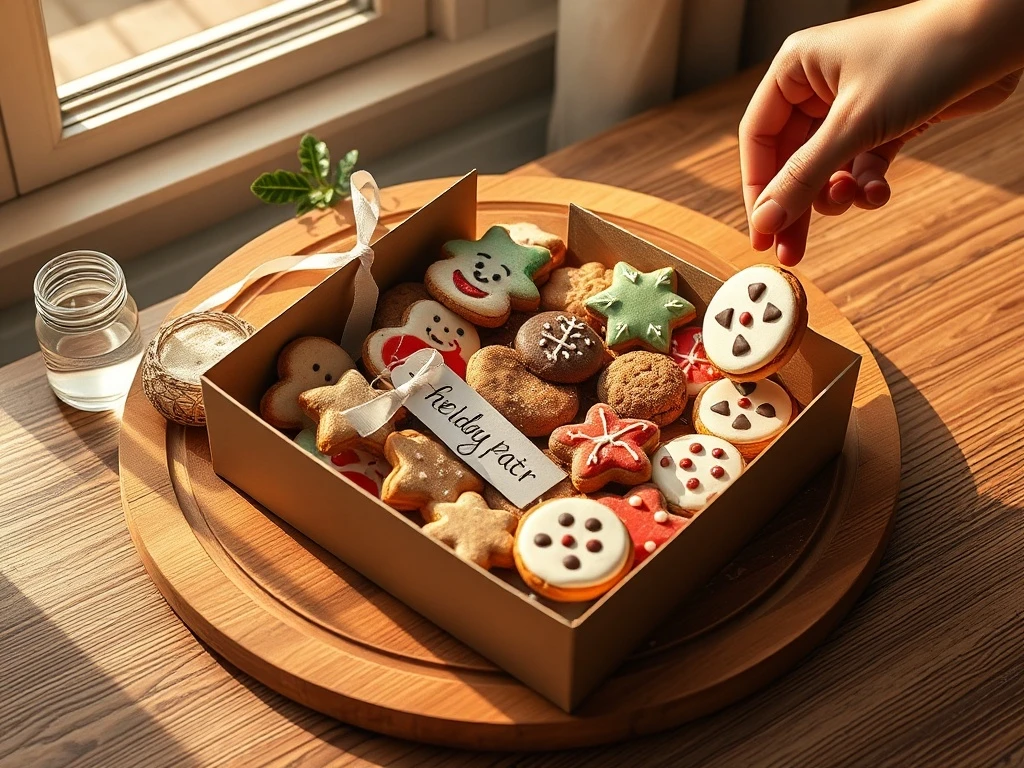
Whether you're preparing gifts for family, friends, or coworkers, this layout ensures your cookies look professionally presented. The open cookie box filled with decorated treats becomes a visual centerpiece for your holiday gifting.
This guide will show you how to create a cohesive design using a wooden board, decorative ribbon, personalized tags, and seasonal accents. You'll learn how to arrange your cookies for maximum visual impact and gifting appeal.
From selecting the right packaging to adding festive touches like holly sprigs and sparkling water, we'll cover every detail to help your cookies shine. Let's dive into the secrets of creating a show-stopping cookie gift box!
Why This Recipe Works
🌟 Visual Impact
The circular arrangement of cookies on a wooden board creates a professional, gallery-like presentation that instantly elevates your homemade treats.
💰 Cost-Effective
Transform ordinary cookies into premium gifts using affordable materials like ribbon, tags, and seasonal decorations.
🎁 Gifting Versatility
This layout works for any holiday - Christmas, Hanukkah, New Year's, or winter birthdays - simply adjust the decorative elements.
📷 Pinterest-Ready
The composition is designed for perfect flat-lay photography with natural lighting, soft shadows, and a warm color palette.
Ingredient Notes & Substitutions
Ribbon
Choose satin or grosgrain ribbon for texture contrast. Substitute with twine or baker's twine for a rustic look.
Pro Tip: Use leftover ribbon from previous gifts to add sentimental value.
Wooden Board
Any clean, large board works. Substitute with a cutting board, tray, or even a vintage map for unique presentation.
Pro Tip: Choose a board with a warm wood tone to match holiday color schemes.
Personalized Tag
Use printable tags, hand-lettered paper, or even a small chalkboard for customization. Include the recipient's name and a holiday message.
Pro Tip: Add QR codes linking to cookie recipes for an extra personal touch.
Holly Sprig
Fresh holly adds natural beauty. Substitute with artificial holly, eucalyptus, or even a small Christmas tree ornament.
Pro Tip: Add a few dried berries for extra festive color.
Pro Tips for Perfect Cookie Box Presentation
🎨 Color Coordination
Choose ribbon, tags, and decorations in complementary colors. For traditional Christmas cookies, use red, green, and gold accents.
📝 Personalization
Add initials, dates, or holiday messages to tags. Consider using edible ink for cookies that include personalized messages directly on them.
✨ Texture Contrast
Mix glossy and matte cookies for visual interest. Add textured elements like burlap bows or jute twine for tactile appeal.
📸 Photography Tips
Use natural light from a north-facing window. Shoot from an overhead angle at a slight angle to avoid shadows. Add a few crumbs for authenticity.
Variations & Customizations
Minimalist Style
Use a single color scheme with simple white tags and natural wood elements. Replace the holly with a single cinnamon stick.
Rustic Winter Theme
Add pinecones, birch slices, and a small snow globe. Use burlap ribbon and a vintage cookie jar instead of the glass of water.
Modern Elegance
Use metallic gold tags, geometric cookie shapes, and a sleek black tray instead of the wooden board. Add a small bottle of sparkling cider instead of water.
DIY Kit Theme
Include cookie dough, icing, and a small decorating kit. Add a handwritten note with decorating instructions. Use a fabric bow instead of ribbon.
Serving Suggestions & Pairings
🍽️ Best Served With:
- Hot cocoa with marshmallows for a cozy winter pairing
- Spiced chai tea to complement holiday flavors
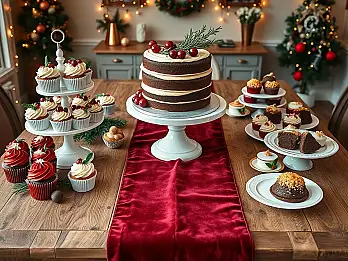
- Mini holiday cupcakes for a complete cookie and cake combo
🍷 Drink Pairings:
Pair with mulled wine for a traditional holiday experience, or serve with sparkling cider for a non-alcoholic option.
Make-Ahead Instructions & Storage
Make-Ahead Tips
Cookies can be baked and decorated up to 3 days in advance. Store in an airtight container at room temperature. Assemble the cookie box presentation on the day of gifting.
Refrigerator Storage
Unassembled cookies can be stored for 5-7 days in an airtight container. Keep the cookie box packaging separate until ready to assemble.
Freezer Storage
Baked but undecorated cookies can be frozen for up to 2 months. Thaw at room temperature before decorating and assembling the gift box.
Reheating Instructions
Not applicable for baked cookies. If you have fresh cookie dough, refrigerate for up to 3 days or freeze for up to 2 months.
Troubleshooting & Common Questions
Q: How do I prevent cookies from getting crushed during transport?
A: Use a sturdy cookie box with dividers to separate cookies. Place tissue paper between layers for extra protection.
Q: Can I use store-bought cookies for this presentation?
A: Yes! Select high-quality store-bought cookies with festive decorations. Add your own ribbon and tags for a personalized touch.
Q: How do I make this layout more kid-friendly?
A: Use simple cookie shapes like snowflakes and stars. Add colorful bows and paper snowflakes. Substitute the holly with cotton balls for a soft look.
Q: What if I don't have a large wooden board?
A: Use a large cutting board, a vintage map, or even a clean kitchen towel as a substitute. The key is to have a stable base for your arrangement.
Final Thoughts
This creative cookie box layout transforms your homemade cookies into a professional-looking gift that's sure to impress. With just a few simple materials, you can create a presentation that feels both festive and thoughtfully made.
Whether you're preparing gifts for family, friends, or coworkers, this layout ensures your cookies look as beautiful as they taste. The combination of a wooden board, decorative ribbon, and seasonal accents creates a cohesive design that's both elegant and approachable.